Part 2: Synchronizing and Creating an AP Invoice
- Feb 12
- 2 min read
Updated: Feb 13
This section covers connecting to Xero and the workflow for creating an Accounts Payable (AP) Invoice (known as a Certified Progress Claim) for a supplier or consultant in UniPhi.
Step 2.1: Synchronize with Xero
You must authorize UniPhi to connect to your Xero organisation for data transfer.
1.In UniPhi, navigate to Configuration > Accounting integration > Dashboard.

2.Click Connect to Xero.

3.Follow the prompts on the Xero authorisation screen: Select the Organisation and click Allow access for 30 minutes.

4.On the subsequent Map to Organisation page, select the correct organisation(s) that are relavent to this Xero file and click the Save icon.


Step 2.2: Create a New Cost Contract
The AP Invoice is generated against an existing contract in UniPhi.
1. In UniPhi, navigate to the Contracts register and select the relevant Project.

2. Navigate to Contracts (tab) and click the Add New Contract icon.
3. Fill in Contract Details:
Type: Cost (as this relates to an expense/bill).
Supplier: Select the contractor/vendor (e.g., Arthur Williams | Birdcat Construction).
Payment Terms: e.g., 30 Days.

4. Define Contract Value and Deliverables:
Go to the Value tab.
Add a new Deliverable (e.g., Project Management).
Rate/Unit Price: Enter the contracted amount (e.g., $2,000,000.00).
Code: Select the mapped Xero Account Code (e.g., 412 - Consulting & Accounting).
Tax: Select the appropriate tax rate (initially, GST Input).


Step 2.3: Generate and Certify the AP Invoice
Create the formal document that serves as the payable invoice.
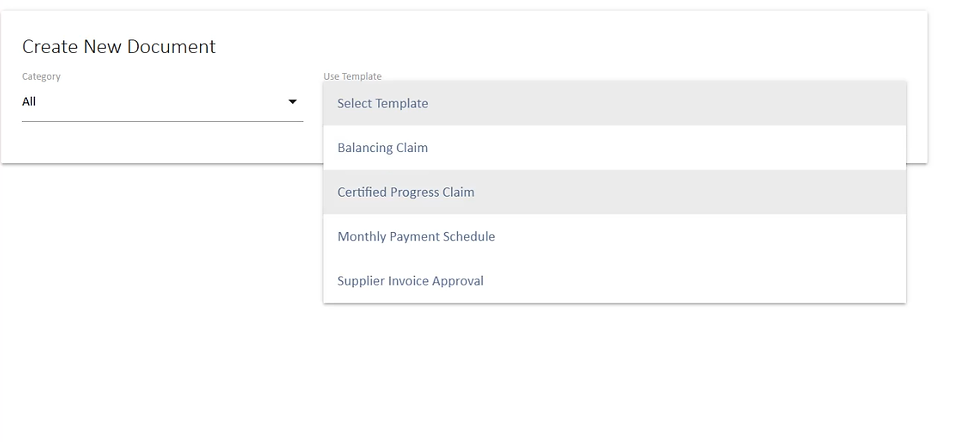
1.Navigate to the Invoice tab of the contract.

2.Click Create New Document and select the template Certified Progress Claim.

3.Complete the Certification Form:
Contractor's Invoice No.: Enter the supplier's invoice number (e.g., INV-1234).
Progress Claim Section: Enter the amount or percentage (e.g., 10% to claim $20,000.00).
Set as Awaiting Signoff


4.Signatures/Certification: Finalise the document by adding signatures to formally certify the claim.

Step 2.4: Export AP Invoice to Xero
The completed and certified AP Invoice is now ready for export.
1.In UniPhi, navigate to Configuration > Accounting integration > AP Invoices.

2.Locate the invoice (e.g., INV-1234), which should have a status of Awaiting Export.

3.Select the invoice and click Export to Xero.

4.The export process will run, and a confirmation should appear.

Alternative Export Method – Dashboard Synchronise
From:Configuration > Accounting Integration > Dashboard
Click Synchronise to export all items currently in an Awaiting Export status.
You may also choose to export individually from:
Contacts
AP Invoices
AR Invoices
Step 2.5: Understanding Invoice Status Views
UniPhi categorises invoices into four status views within both AP and AR screens.
Accounts Receivable (AR)
Status | Meaning |
Awaiting Export | New invoices that have not yet been sent to Xero |
Failed | Invoices that attempted to export but failed due to an error |
Success | Invoices successfully exported to Xero |
Orphaned | Invoices against contracts where:• No Supplier Organisation is assigned• The supplier organisation is not mapped in the Xero Settings page |
Accounts Payable (AP)
Status | Meaning |
Awaiting Export | New invoices that have not yet been sent to Xero |
Failed | Invoices that attempted to export but failed due to an error |
Success | Invoices successfully exported to Xero |
Orphaned | Invoices against contracts where:• No Customer Organisation is assigned• The customer organisation is not mapped in the Xero Settings page |


Comments